twitter facebook instagram bloglovin tumblr google plus pinterest youtube
Showing posts with label DIY. Show all posts

8/21/16


The right florals can add just that extra touch to any room in any home. Here are the 10 lessons we've learned from B Floral, New York's premier floral and event design company.  


Lesson 1: Transform any tablescape with a few well placed succulents. 


Lesson 2: Speaking of succulents display them in varying heights to add depth and texture. 


Lesson 3: Baby gold pineapples will brighten up any room. 


Lesson 4: Sometimes it's more about the way the flower is presented, rather than the actual flower. Fill a square glass votive with pebbles and place one, single floral, then repeat. 


Lesson 5: "Powder blues and creams make a great contrast against a marble tabletop."


Lesson 6: Bathtime like a Queen "Wind down with a mid-week bath soak! Add blooms and floating candles to create the perfect atmosphere for relaxation." 


Lesson 7: "Use shells as vases to give your succulent arrangements a unique twist."


Lesson 8: "Surround a tall arrangement with a smaller arrangement to create a grande and vibrant centerpiece."


Lesson 9: "Use a palm leaf as a plate charger to elevate your tropical tablescape."


Lesson 10: "Less is more. Smaller vases can still make a huge impact when paired with full florals and neutral linens."


We can't wait to try some of these tips and tricks in our own home!

Stay Lovely, 

D.R

Editor and Curator of

Dusk & Rubies Blog 
 photo arrow.pngCONTINUE READING

7/7/16


This year wellness has been our major priority. Healthy mind, healthy body, healthy spirit has become our mantra of sorts. So today's post is all about skincare. 

It's been a major issue for me, since my whole life (even as a teen) I had pretty nice skin. Now, as an adult, I probably have more blemishes than ever before. I have tried so many products, creams, and scrubs.

Real deal? I am also super lazy (when it comes to certain things) and want something that is low maintenance and cost efficient. Anyone else? 


So, when I find out I could make my own scrub that could:
exfoliate, clear skin of bacteria, reduce under eye puffiness and puffiness in general, and smooth skin without paying a dime, I was all in. 

Ingredients (House hold items I had and you will need)

3 tbsp coffee grinds
1 tbsp olive oil or coconut oil
1 tsp brown sugar
1 tsp ground cinnamon 

Stir together and voila!


The trick is to pat it onto your face first and then massage with fingers in small circles. Then, massage with cold water. Try to let the scrub stay on your face for 5 minutes and then clean off with a cold wash cloth. 


I will tell you the one downside; it is that it is very messy. Make sure, upon application, that you do this scrub over your sink. It won't stain anything, but the grinds do get all over. Your best bet is to do this in the shower. 

Another tip: I used the scrub as a body scrub a few days later and it made my skin feel awesome. 

Overall this DIY was super easy, super useful, super cheap, and pretty effective. I immediately saw a definite luminance to my skin that sometimes you lose in the summer months from sun damage, chlorine and such. 


Remember wellness doesn't just extend itself only to what we look like on the outside, but also how we feel on the inside. The summer months gives us the perfect time to experiment and try new things. 

Stay Lovely,

D.R.

Editor and Curator of

Dusk & Rubies 
 photo arrow.pngCONTINUE READING

1/12/14


So, you're having people over and your walls are absolutely naked! This is quite the dilemma. Unfortunately, with your busy schedule there is not enough time to shop around and procure art. Plus, your wallet took a big hit from all your holiday spending. Try this easy fix and add warmth to any room with this easy idea. 

See how I transform four deeply discounted frames ($2 each) into a work of art worthy for display.


What you will need:
- 4 discounted frames (exact: from Pier 1 Imports "Red Capiz")
- PL 500 Loctite glue
- Scissors
- Jute Twine
- Card stock and scrapbooking supplies
- Tape
 - Hot glue gun
- Ply wood ¼ inch thick.
- Hooks
- Steel wire
- Drill

Approximate Time:  24-48 hours depending on how long it takes for your glue to dry.

Step 1: Line up your four frames the way you plan on having them hang on your wall. (I chose to create one large square but you can really arrange them anyway you like.)

Step 2: Next, depending on the type of frame you have chosen, remove the adjustable stand piece (not the back board) with a drill or screwdriver.

Step 3: Use pressed flowers, sprayed or glittery florals to create a pattern that you will use in your frames.


Step 4: Once you have matted your photographs, forals, or whatever you choose to place into your frames, you are going to close and secure your creation, and then cut a piece of plywood down to size. Mine is 24” by 28”.

Step 5: Using your pl500 Loctite glue, glue the frames to the plywood.

Step 6: Make sure you add pressure to your frames by layering something heavy on top. This will ensure a better, and stronger adhesive between the plywood and your frames. Let the glue dry for at least 24 hours.

*TIP* Your college textbooks can be used here…if you were having doubts that you would ever use them again

Step 7: To hang your beautiful work of art, you’ll need to add hooks to the back of your wall décor. Make sure they are far enough down that when you add your steel wire and hang your beautiful creation it won’t be seen. No one likes wires sticking out!

 
 So many finds, so little time!


Have the perfect place for a DIY like this? Share where you would hang this masterpiece in the comments below. 

Stay Lovely, 

D.R

Editor and curator of

Dusk & Rubies 
 photo arrow.pngCONTINUE READING

1/9/14


You know the saying, "one man's junk is another man's treasure"? Well, I'm that man (er-woman) who can always envision the limitless possibilities behind the dejected, disregarded, and deeply discounted. See how three clearance fabric placemats are used to create this warm and funky multi-purpose bohemian tapestry!

What you will need:

-3 fabric placemats (exact: from Pier 1 Imports "Chindi")

- Needle and matching thread

- Scissors

- Jute Twine

- Card stock and scrapbooking supplies
- Buttons
- Hot glue gun
- Mod Podge (I used the Matte finish)
- Pictures of friends, family, vacation spots
- Pins

Approximate Time: Depending on your creation, and pace anywhere from 1-3 hours

Step 1: Line up your three placemats on your work space with the tags up. Cut off all three tags, and then thread your needle with a thread that matches the stitching of your placemats. (I used a white)


Step 2: Sew the placemats together, and try to stay within the stitching.

Step 3: Once you're finished sewing your placemats together, it is time to add the jute twine. Cut your desire length of jute. (I wanted mine to hang tight to the hook so my jute twine was cut on the shorter side) Sew the jute twine on to the back side of your tapestry. (This way the front will look clean)


Step 4: Now, if you're using this bohemian tapestry as a way to add a window treatment you might want to leave it blank, and then hang one on either side of your window. But, if you want yours to look just like mine you're going to use your scrapbooking skills to create small picture frames for your tapestry. Use cardstock, buttons, jute twine bows to really make each picture festive.

Step 5: Use Mod Podge (Matte) to paste the photographs onto the cardstock, and for the buttons. But, use hot glue to adhere the jute bows.


*Tip*: If you want to be able to change up your photographs or rearrange them, then sew the cardstock on instead of hot gluing them to the fabric placemats. All of my photographs are sewed on!

Step 6: Hang it!

*Tip*: For a third purpose, your bohemian tapestry can also be used as a way to display/organize your baubles and jewels. Simply hook your earrings into the fabric, and add pins from a pin cushion to secure necklaces and bracelets!


So many finds, so little time!
What will you use this DIY for? Let us know in the comments below.

Stay Lovely,

D.R

Editor and Curator of

Dusk & Rubies 
 photo arrow.pngCONTINUE READING

12/28/13


I can never make just one New Year's resolution, and I think that is a good thing. Why not reach for as many goals as one can muster in one year? Plus, I don't want to put all of my time and energy into losing weight- that would just drive me crazy. Instead, I always make a few resolutions for different areas of my life like, relationships, health & fitness, aspirations, family, spirituality, career, and self. This way as each year passes I am moving forward in as many ways as possible. I also don't beat myself up if I don't reach my goal in one year. Some goals take more time! 


For my health & fitness resolution, I wanted to lose weight the healthy way. I wanted to lose weight, gain muscle, go to the gym more, and maintain healthful eating habits. Although I started losing weight in February and not December 31st at 12 am, I am continuing my journey of healthy weight loss going into 2014. This year I am 13 lbs lighter than I was last year. I consider this a complete win, and am enjoying taking my time as I lose weight and move towards my goal!

Here are some tips to help you keep your resolutions this year:

1. Celebrate your efforts towards your goals even if you haven't met, or completed them yet. It is the steps we take in the right direction that count. 

2. Don't measure your progress strictly by "how much". Meaning, don't measure by how much money you saved, or how many pounds you lost, but by all the changes you have endured and the growth you see in yourself as you have steadily worked towards your goals.    

3. Remember, some goals take more than one year to complete! Think about the goal you are setting. Is it a two-year goal? Three year? Four year? Setting appropriate goals means understanding what you can actually achieve in a certain time frame. Reaching our goals is supposed to be fun and gratifying, not stressful and overwhelming. 

4. Keep yourself motivated throughout the year. With weight loss, I find it works best to give myself short goal incentives. At the end of every month I would celebrate with something special like a new dress, a small stay-cation, or a new book. 

5. Make more than 1 resolution! Instead of focusing on the resolution you didn't meet, what about all the ones you did, or are in progress? Having more than one resolution gives you more than one opportunity to make it stick. 


Want to know how to make these completely motivational weight loss trackers? It's simple...

DIY: MOTIVATIONAL TRACKERS

Step 1: Find or buy 2 glass jars (Mine are candle holders from the Dollar Tree)

Step 2: Hot glue one of your glass jars/ candle holders onto a glass candlestick holder (also from the Dollar Tree) 

Step 3: Use scrap booking letters to label your two glass jars. For an even easier DIY use stickers to label "pounds lost" and "pounds to go". Further decorate your glass containers however you please! 

Step 4: Find or buy marbles, buttons, glass gem filler, or anything else you can get your hands on to use as counters. Pebbles from the beach will work as well, and they're free...and Voila! 

Step 5: With every pound you lose, you will be able to move a stone from your "pounds to go" pile into your "pounds lost" pile. It is a very rewarding feeling! 

You can use this DIY to track anything! It could be miles you ran during the week, money you saved, or even each resolution you plan to reach this year. Find what inspires you to be better this year, and start moving towards it.

What are you planning to make your New Year's Resolution this year? Share with us through e-mail, facebook, instagram, or in the comment section below!

Like always stay lovely, 

D.R

Editor and Curator of

Dusk & Rubies Blog

 photo arrow.pngCONTINUE READING

8/13/13

Can't afford a tropical vacation? That is A-Okay because here at Dusk & Rubies we have the perfect fix...you're very own tropical happy hour where the living is easy, and the drinks are even easier to make!

While in Grenada I had the pleasure of trying some new cocktails, and when I got home I had to try to recreate them. Here are three easy recipes, and some low calorie options to some oldies but goodies!


Stay Lovely,
 
D.R
 
Editor and Curator of
 
Dusk & Rubies
 photo arrow.pngCONTINUE READING

7/9/13


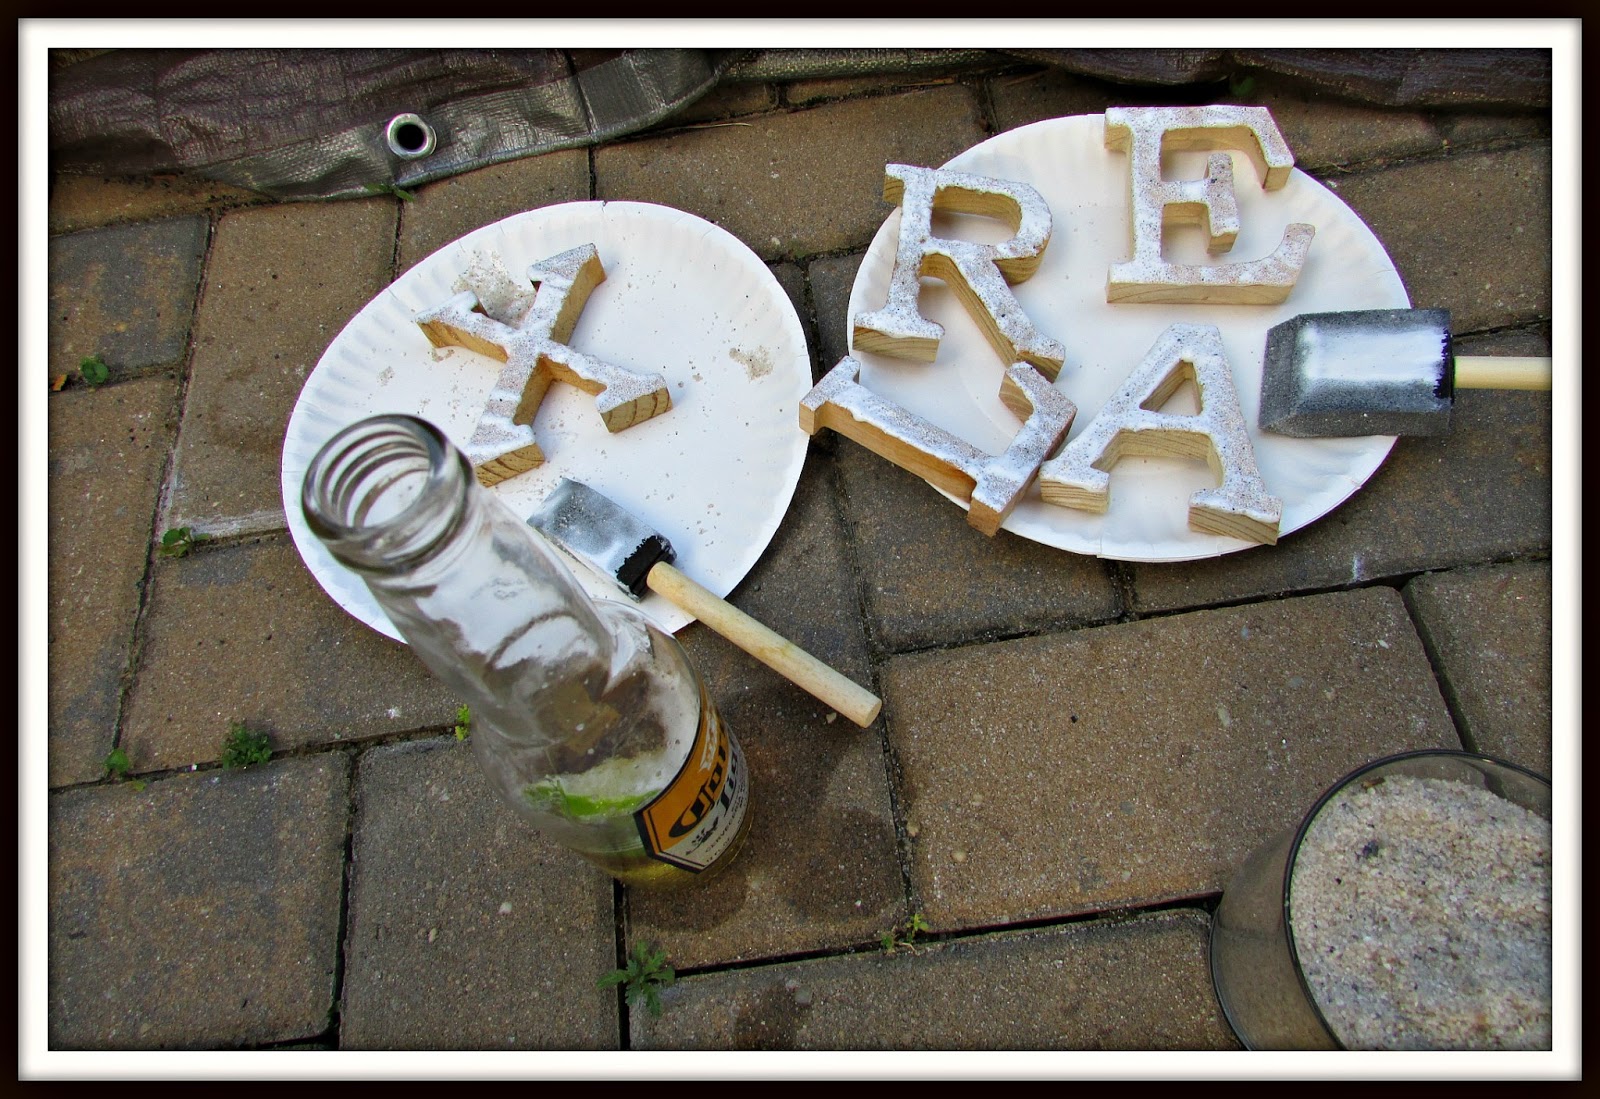
What You Will Need:
 
Wood letters in desired size
Sand
Mod Podge
Sponge Brush
Paper Plate


Step 3: Once you have completed steps 1-2 for each letter to make sure the sand doesn't fall off cover with a thick covering of mod podge once again. Don't be alarmed if it looks white like the picture above. Mod podge dries clear.  
 
 
It is super relaxing when you have a DIY that is no muss and no fuss.
 
 Stay Lovely,

D.R

Editor and Curator of

Dusk & Rubies
 

 photo arrow.pngCONTINUE READING

6/25/13


Step 3:
Add a dab of hot glue at the bottom of the hurricane, press and secure the end of the twine into the glass.
 
Step 4:
Then wrap twine around the glass however many times you prefer. Once you have wrapped the twine around the glass enough times, secure the end in the back with another dab of hot glue.
 
Step 5:
Hot glue a sea shell onto the front, and you are FINI!


Stay Lovely,
 
D.R
 
Editor and Curator of
 
Dusk & Rubies

 photo arrow.pngCONTINUE READING

6/18/13


What you will need:
Scissors
Tape
Pencil
Decorative Letters
A Lighter
Ribbon
Wrapping Paper
A Picture Frame
 
 
Steps:
 
1. Use the glass part of the picture frame as the template to trace. Trace the glass square onto your choice of wrapping paper.
 
2. Cut out your square and tape it to the cardboard inside of your picture frame. Then tape a smaller piece of the color card stock you prefer. I chose a light grey as seen above.
 
3. Cut four pieces of ribbon an 1/8th of an inch longer than you need it to be. These pieces of ribbon will frame your card stock.
 
4. Use your lighter to heat the ends of your ribbon so they won't fray.
 
5. Tape your ribbon around your card stock.
 
6. Use sticker lettering (you can find these in the scrapbooking aisle) if you want, or you can draw your message out yourself if you're great at calligraphy.
 
7. Put your frame together and, voila!
 
Stay Lovely,
 
D.R
Editor and Curator of
 
Dusk & Rubies Blog

 photo arrow.pngCONTINUE READING

6/7/13

The newest trend...or should I say an old trend becoming popular again is macrame bracelets! It was a rainy day today so I ran at the gym instead of outside, had an appointment to get my passport finalized for this summer's escapades, and then decided since it was still raining to craft and make these adorable bracelets!


What you will need:

- Nylon cord, or wax covered cotton cord.
- Fun buttons and or beads
- Tape
- A ruler
- A sewing needle

Click the link, or take a look at these videos for step by step instructions on How to Macrame!


Tip: If you decide not to use the tacky glue to secure your knots, then you can always use a lighter. I used a lighter to melt the wax and secure my cord's knots.

Hope you have fun making these like I did!

Stay Lovely

D.R

Editor and Curator of

Dusk & Rubies
 photo arrow.pngCONTINUE READING

4/30/13

Positive Energy Looks Good On You!


You know that moment when you're driving, or going about your day and you realize today is a good day? Or, you think about how things are finally going your way and you have this feeling of contentment, of satisfaction? When I have those moments, those days, or those self-realizations I take a moment to honor them and smile. Sometimes I wonder why I can't just bottle that feeling up and use it whenever I want to. And then the answer hits me, if I were to be on that constant high all the time I wouldn't be aware that it existed, and it wouldn't be as enjoyable.

Still, I think there are ways that we can ensure that those moments of pure bliss happen to us more often. I know we deserve it. I've compiled a list that has always worked for me:

1. Try new things. It is exciting for me to try new things, or go to new places. The discovery, the experience, it is as if I am a small child again and I am experiencing the world's wonders for the first time.
2. Set achievable goals. If you set achievable goals, then you are more likely to meet them. Whenever I meet a goal I feel good about myself; I feel as if I am moving forward with my life.
3. Know your truth. I watched an interview with Oprah Winfrey by Steve Harvey last week and she said that we should "know our truth" and that among other things is a major key to success. Knowing your truth is knowing what you want to stand for, what you want to represent, and who you are.
4. Laugh everyday. Laugh at yourself; laugh at absurdity; laugh at awkward situations; just laugh.
5. Do something just for yourself. It could be as simple as listening to your favorite song for two minutes, or as extravagant as scheduling a massage on your tropical vacation. Find some part of your day that you can claim as your own.
6. Celebrate the little things. Hey, you did a good thing? Celebrate! You saved up enough money to go to Paris? Celebrate! You got along with your in laws? Celebrate! You helped someone in need? Celebrate!  Have a glass of wine as you relax at night; go out with friends; take a hot yoga class; go for a cleansing hike; the ways in which to celebrate are endless!
7. Get your charity face on. Giving time to whatever cause, whatever charity you choose is so important. Not only are you helping others, but knowing that you have helped someone in need is extremely rewarding. You can do anything from help build a house for Habitat for Humanity, to donating your prom dress to someone who can't afford one. Any small act of charity, is in reality, never small.
8. Spend the day with someone you love. There is nothing better than sharing some time with someone who supports you and whom you support. If it's mom, or your sister, or a girlfriend have a girl's getaway day. I do this all the time!
9. Don't forget to give yourself a pat on the back. Sometimes we focus too much on if others are proud of what we have accomplished, but what would make us all happier people was if we could be proud of ourselves. Make sure you know that you're are proud of yourself everyday.
10. Compliment others. I will never forget the advice my mother gave me when I was in Middle School. She told me to try, everyday, to compliment at least five people. I can't begin to express how that one action changed my life. I began to compliment more than five people; I began to compliment people I didn't know.  People remember compliments. They become more open to you, and they want to spend time with positive energies. If you put positivity out into the universe, you will have positivity returned to you.

And if you still want to bottle up that pure bliss feeling:

Here is an adorable DIY I came up with, so you can see your joy, your pure bliss, your oh so happy day kept in a jar, and reminded of its power. Put the jar on your desk at work, or on your bedside table!
Supplies: Mod Podge for puzzles, Dollar Tree Candle in a scent you prefer, stock paper, and a brush (but I used my fingers).

Step 1: Carefully peel off the sticker in one piece.
 
 
Step 2: To make your own label- place sticker on a piece of paper so that you can cut it out, and then use it to trace.

Step 3: Trace the label on a piece of card stock you would like to use.
 

Step 4: Adhere your handmade label with a healthy amount of Mod Podge on both front and back of label.


Step 5: Voila! My Essence of Joy bottled for any day!


Stay Lovely,

D.R

Editor & Curator

Dusk & Rubies
 photo arrow.pngCONTINUE READING
blogger template